"In this classroom, relationships are fostered, families are respected, and children are honored.
In this classroom, nature's gifts are valued and children's thoughts are captured.
In this classroom, learning is alive and aesthetic beauty is appreciated." -Unknown

Wednesday, April 17, 2013

Earth Focus: Worms, Snails and Slugs...Oh My!!


Our new theme is Spring and we're covering lots of subtopics. This week we were learning about soil, worms, snails and slugs. We've been assisted by lots of amazing books, a great song, a phenomenally informational GEMS guide, and lots of ideas from other early childhood educators, Pinterest, and friends. 

These are some of the AMAZING books
we've been using in our study.
Each of them have something special about them
and I STRONGLY recommend every one of them.
I actually found Mr. Carey's Garden at the local library,
but enjoyed it so much that I ordered it through Amazon.

GEMS: Terrarium Habitats
This guide provides detailed information about
worms, snails and slugs. It's actually a guide for
setting up terrarium habitats. We pulled the pertinent
information from the guide. That's one of the things I
LOVE about the GEMS guides, you use what works for
your program and your class.

We began with soil exploration.
We dug up some soil from our
school garden and placed it on the table.
We provided magnifying glasses, tweezers, and a
craft stick for our inquisitive little friends.
They discovered some roots,
leaves and other materials in the soil.

We just received our new sensory table and are
THRILLED with it. We placed garden soil and
potting soil in the garden along with plastic insects,
silk flowers, root veggies (carrots, artichokes and
asparagus), watering cans, gardening gloves, garden
spades, plastic worms and aprons.

I LOVE it when I see one friend helping
another friend without any adult involvement.
This year we have one friend who has learned
how to tie her shoes and other stuff. She was
the perfect friend to help with this task.


The kiddos fell in love with the song, 
Dirt Made My Lunch and were truly
able to grasp the concept of the need
for good soil to grow EVERYTHING
they eat. This video clip is very old,
as the Banana Slug String Band look
nothing like this now, but you can
hear the song this way. 

We start our study with determining what the kiddos
already know about the subject. We document whatever
they say, whether accurate or not. During the study
we'll determine what is true and what isn't. Very quickly
after we took down the info, the other kiddos shared
knowledge with the "Worms have legs," friend and he
decided that wouldn't stay on our board any longer.

We set up a mini worm farm. We found an appropriate
see-thru container, placed a capped water bottle filled with warm
water in the center of the container. We then layered
soil, sand, soil, sand, soil. We sprayed the top
layer with water, added some spinach leaves on
the top, then put in the worms. We then wrapped a band
of black construction paper around the container.
The next day we removed the black paper and could
see where the worms had tunneled through the layers.
*We did poke holes in the lid for air holes: large
enough for breathing, but small enough so they couldn't
climb out of the container. 


We were BLESSED with the gift of a worm farm bin
from our Nana Teri (grandmother of one of our students).
We placed shredded paper, a little soil, and some
lettuce in the container. We spritzed the contents with
water, then added the worms.

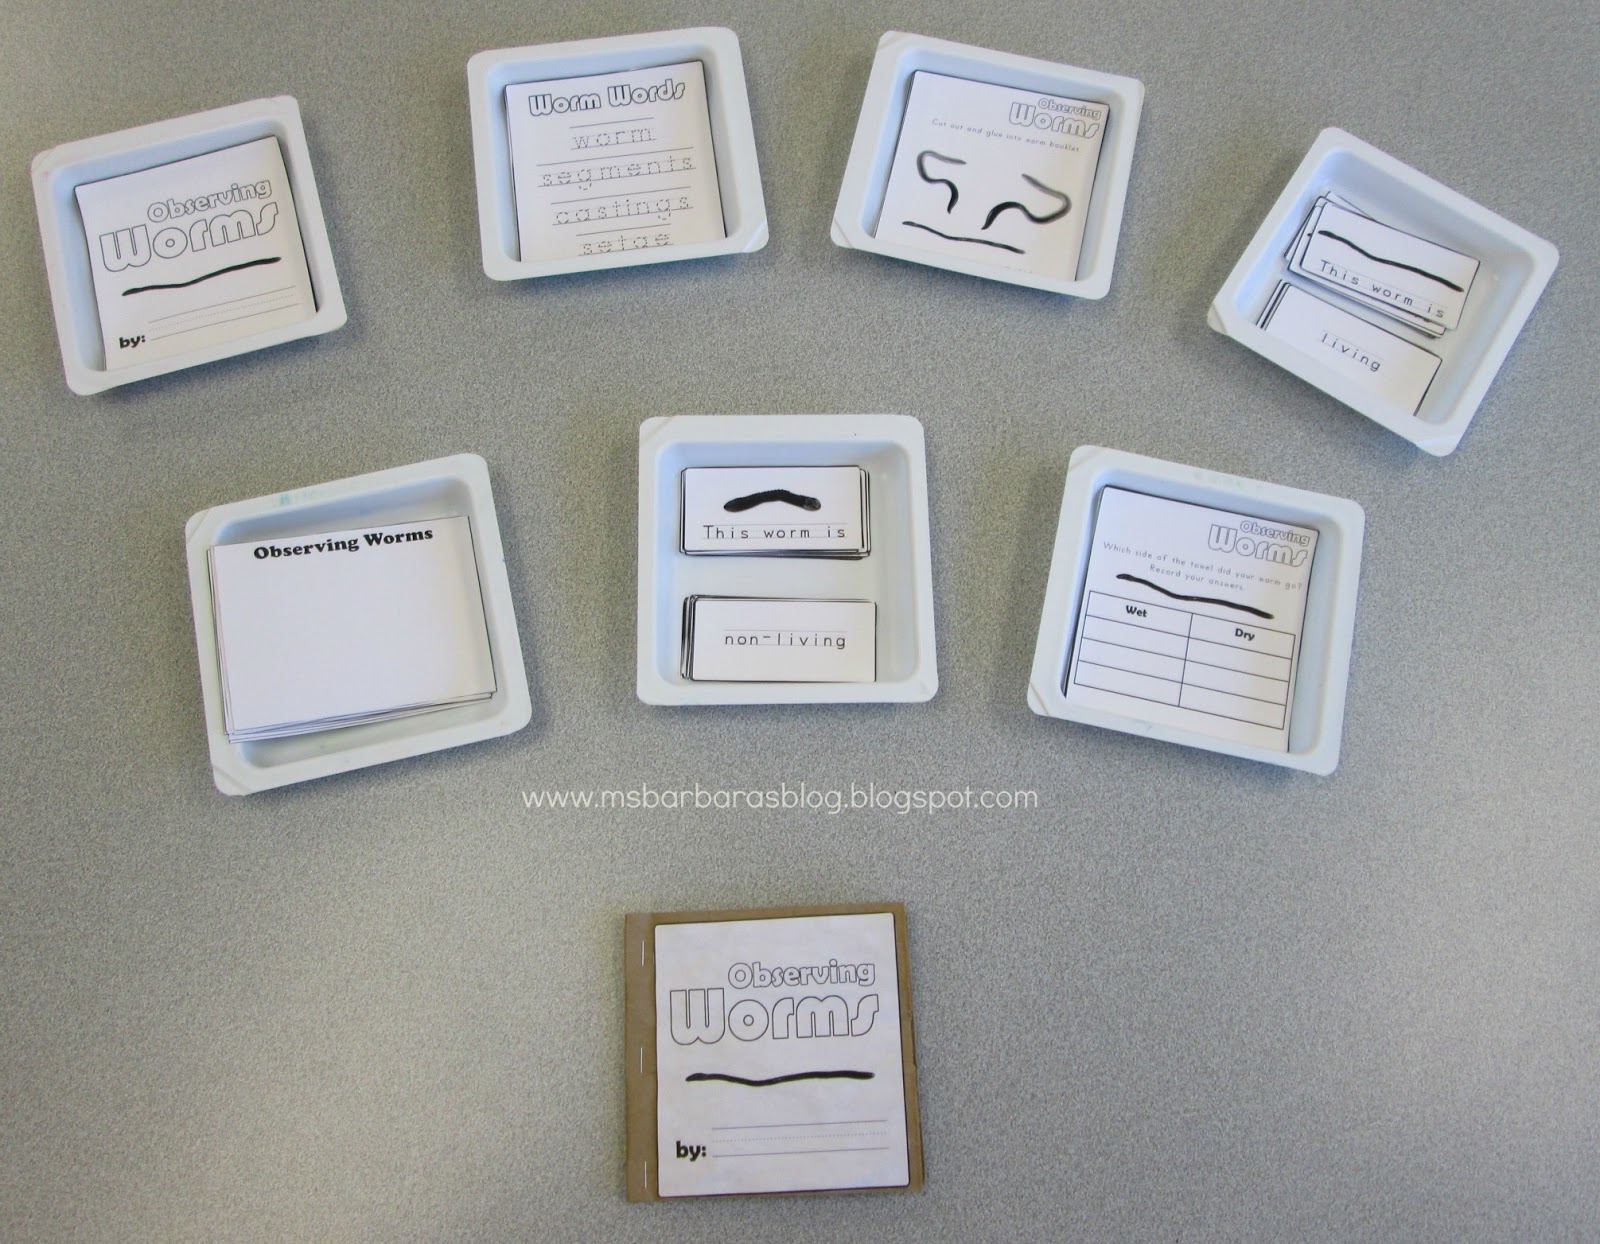
We placed a wet paper towel beside a dry one,
then laid a worm on it to see which side it
would prefer. Thanks to spelloutloud.com for
this idea, the download of the book below
and the suggestion of using the water-filled bottle
in the mini worm farm!!


Observing Worms book download
from www.spelloutloud.com

Our "worm" painting provocation:
plastic worms, two shades of blue
and green paint, paper.

These friends were very busy painting with worms.

No worm study would be complete without
tunneling like a worm.

We discussed that worms, snails, and slugs were
invertebrates. The kiddos are familiar with the term
"spine" when we talk about the parts of a book.
I pulled out our skeleton model and showed them
all the bones in a spine and talked about how any animal
with a spine is a vertebrate, any animal without a
spine is an invertebrate.

Once again we gather the beginning knowledge
of snails. The kids were pretty knowledgeable.

Our snails were brought in from a child's home.
The parent collected them and put them in a large
plastic coffee container with a few coffee grounds
in the bottom. The caffeine definitely had an
impact on them. I've never seen snails move so fast!
It was a totally unplanned experiment and not
one I would have set up intentionally.

The kiddos LOVED playing with the snails.

This friend looked through the magnifying
glass after the snail was crawling on it.
He was able to see the "foot" of the snail
move. It looked kind of like ocean waves.

After our snail day ended, we moved them into
their own habitat complete with soil, plants,
veggies, and an occasional spritz of water. If
you look closely you can see their silvery paths.
 
We then began studying slugs.
This was the next day and they
didn't move nearly as fast as the
snails, though they had been in
the same container. Who knows?

Look closely to see the shiny trail!

We also had some leftover real flowers and
decided to use them for some flower painting.
The results were beautiful!

We're having so much fun!!

Wednesday, April 10, 2013

Bees...A Preschool Study


As we continued our insect study we moved into a week long study of bees.

GEMS: Buzzing a Hive

We transformed our Science area to a Bee focus. Items included:
bee poster cards, large bees poster, hive frames, books, honey,
beekeeper hat, bees for observation, beeswax, honeycomb,
magnifying glass, and bee vision viewer.

Beekeeper frames: (from top to bottom)
empty frame, frame with pollen and honey,
frame with honey and capped areas.

Beekeeper outfit: coveralls, gloves, hat.

We always try to start a unit with the kiddos sharing what they think to be
true about the new theme. We don't correct their statements if they aren't correct.
They will realize the truth as we study the topic, then we can adjust the board.

Each kiddo created a bee. This wasn't an art project, but
a Science one as we discussed the actual body parts and
talked about where each part would be on a real bee.

Observing the bees. The GEMS kit included a container of deceased bees.
We still placed them in containers so the children would be safe and not
scared of holding them. 

The focus here was on showing the kiddos how the bees  use the pollen sacs
on their legs to collect pollen from the flowers. 

Each kiddo took their own bee (cotton ball) and rubbed it on the pollen to
see how it transferred from the flower to the bee. **Lilies are toxic. As soon
as the children completed this activity, we had them wash their hands.

I discovered this concept through Play at Home Mom's blog and adapted
it to work in our program. Please check out their post. We put yellow colored
water in a vase with silk flowers. The children used a turkey baster (their proboscis)
to collect the water (nectar) from the flowers. 

They then transported it across the playground and released it into the
cells of the hive.

These are our filled cells.

We talked about how the bees hang together and stretch
their bodies in order to release the beeswax from their
bodies to create new cells.

Of course, then we had to try it with our bodies to understand how
they would feel when stretching and connected to the other bees.
I saw the concept of creating a beehive with bee at Mama to 4 Blessings and
then adapted the concept to work with our preschoolers. The kiddos rolled
yellow paint onto bubble wrap that was taped to the table. 

After rubbing the paint onto the bubble wrap, they pressed their paper on it
to make a print that looked a lot like the honey cells.

They then stamped bees onto the hive. 

We tasted bee pollen that had been processed by bees. 

We tried honey from local beekeepers. Thanks to the
Bester family.
We culminated our study with the creation of a beehive.
We used cardboard egg cartons and bulletin board paper for
the hive. We then added yellow translucent wadded up paper for the
honey and capped the cells with wax paper. We added large yellow
pompoms for the pollen in the hive. We displayed our queen bee,
all the children's created bees, and even connected three of them like
they do when they want to extract the wax from their bodies to make more
cells or to cap off cells. So much fun!! 

Some friends were inspired to don bee apparel.


We did this study in one week, but determined that next time we need to set aside a two week period to do it justice. There was just so much valuable information in the guide and not enough time to cover it all.

I believe the kids developed a new appreciation for bees and the good that they do. 


Monday, April 1, 2013

Butterflies...Hands-on Activities to Enhance Learning


We have been studying insects the entire month of March. The first week was insects in general. Our second week study was on ladybugs. You can check it out here: Ladybugs!! Keepin' It Real... The third week was dedicated to learning all about butterflies and we have lots to share. We used a variety of resources, but our main source of ideas and inspiration was the GEMS: Hide a Butterfly guide. You can click below to learn more about it. 

GEMS: Hide a Butterfly
We set up our science area for insects, but our main emphasis, as you can see below, was on butterflies. We used a life cycle poster, butterflies variety poster, field guide, books, shadowboxes with real preserved butterflies, and more.


 We try to begin a study by asking the kiddos what they think they already know about the topic. We don't correct anything that is incorrect at this point. Generally, throughout the study, the kiddos will decide to change previous statements as they learn new things. 


I found this cool butterfly matching cards
on www.prekinders.com. I printed the cards
out, matted them, then laminated them. I
placed the field guide out to extend the
activity, if they chose to do so.


We provide multiple pairs of butterfly wings for the children to wear and one friend brought her own pair and then proceeded to share them with the other kiddos. 


We had a dot-to-dot that resulted in a butterfly if the children followed the numbers in order. I created a number line from 1 to 14, just like the dot-to-dot, to assist with the process. 


We talked about how the butterflies unfurl their proboscis to drink the nectar out of the flowers. I found some party blowers at a store and brought them in so each child could role-play the action. The kiddos LOVED this!


The GEMS: Hide a Butterfly incorporates several activities that the children create items to make a mural that comes together at the end of the study. 
It began with creating a flower. Each child
cut their leaf out and then snipped to make
their grass.

They then created a butterfly in the same color
as the flower they had done. We discussed
symmetry and how the designs on each wing
needed to match. 
 
This was a really cute activity called "What Comes
Next?" Each child was given the four images. They
were encouraged to place them in order and then
were given the opportunity to glue them down on
the paper.


We did a variety of re-tellings of The Very Hungry 
Caterpillar; first with the book itself...


 then with the card stock cutouts and puppets...

then the flannel board re-telling...

then the kiddos got to re-tell the story themselves.

One friend even drew her own rendition
of the story and made it into a book
format then volunteered to tell the
story to me. Click on the link below
to hear her tell the story.
*Note: I love Eric Carle,
but we all know that the caterpillar in
his story turned into a butterfly. I'm
not sure why he called the pupa stage
a cocoon, so we discussed it and decided
we would call it a chrysalis instead.
My Little Friend's Butterfly Story
We sorted out the parts of the life cycle:
egg, caterpillar, chrysalis, butterfly and 
then had a place for a leaf and a flower.

We had been given some foam butterfly shapes.
We put out a variety of foam colors and encouraged
them to cut out shapes and other pieces to add to
their butterfly. Note the cool antennae one friend
added to her creation. 


We created butterfly life cycle bracelets. We had
a white bead for the egg, a red bead and three green
beads for the caterpillar, a shiny bead for the
chrysalis, and a butterfly bead for the butterfly.
They turned out so cool!! It was great fine motor
practice and each child could relay the life cycle
to the parents by looking at their bracelet.


When all the props were complete we were able
to use the mural to act out a drama. The kiddos
saw how the butterfly that landed on the flower
of the same color was camouflaged better from 
the birds, even more so when they would close 
their wings. How they were more obvious to the
birds if they landed on a flower of a different color
and how easily the bird could snatch them up.


After we completed our week long study, we
did another chart of what we had learned.


When all was said and done, I put all
of the creations from the week up on the
wall completing our mural.

We had so much fun!!